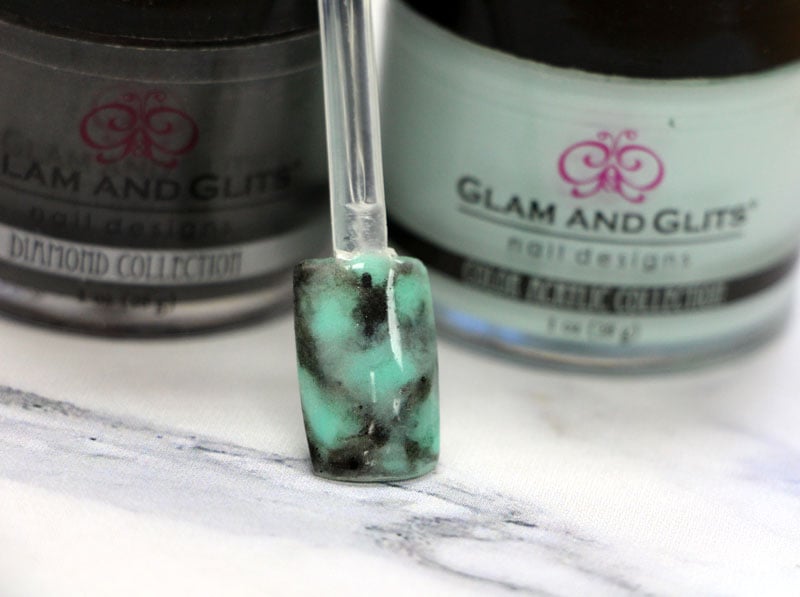
Try the marble effect for a classy finish on your nails with the resin and powder technique, also known as the dipping technique. This tutorial will help you understand the different steps to get the marble effec!
Material
- Dipping resin
- Flex resin
- Glam and Glits Blue
- Glam and Glits Black
- UV resin
- Files and buffer blocks
Steps to make Marble Nails
- Take your dipping resin and wait for a drop to form at the end of the brush.
- Dip the brush in the blue powder.
- Apply randomly on the nail to create spots.
- Wipe the brush on paper between each dipping to avoid contamination of the resin.
- Repeat these steps to cover the nail in blue.
- Repeat the first steps, but this time with the black powder. (Continue without using the activator to allow mixing of the two colors)
- Once you're done with the two colors, use the activator and wait a few seconds.
- File the surface of the nails and use a yellow buffer block, then remove all dust from buffing.
- If you feel like you need, you can retouch now with more resin and powder.
- Spray activator. Wait a few seconds, file and buff to make surface smooth.
- If you need to, apply a bit of flex resin in the middle of the nail to create a stress point (apex).
- Use activator if you used the resin flex. Wait a few seconds, file and buff to make surface smooth.
- Apply one coat of UV resin as the finishing layer. Cure 10 seconds under UV lamp.
- Repeat the last step up to 3 times and make sure you get the free edge for a perfect finish.








1 comments